Adding a steering rod to the Infinity recumbent
Nicholas LaCara – 30 May 2024 – Portland, meThis is how and why I replaced the steering cables on my Infinity recumbent with a steering rod. There's pictures and links to where I bought the parts.
I also discuss this project in this YouTube video. The Infinity is a long-wheelbase recumbent bicycle that uses under-seat steering. Since the handlebars are under the seat, away from the front fork of the bike, there needs to be some sort of mechanism connecting the handlebars to the fork so that the bike can be steered. This type of steering is often referred to as indirect steering, since the handlebars are not directly connected to the fork as they are on upright bicycles.
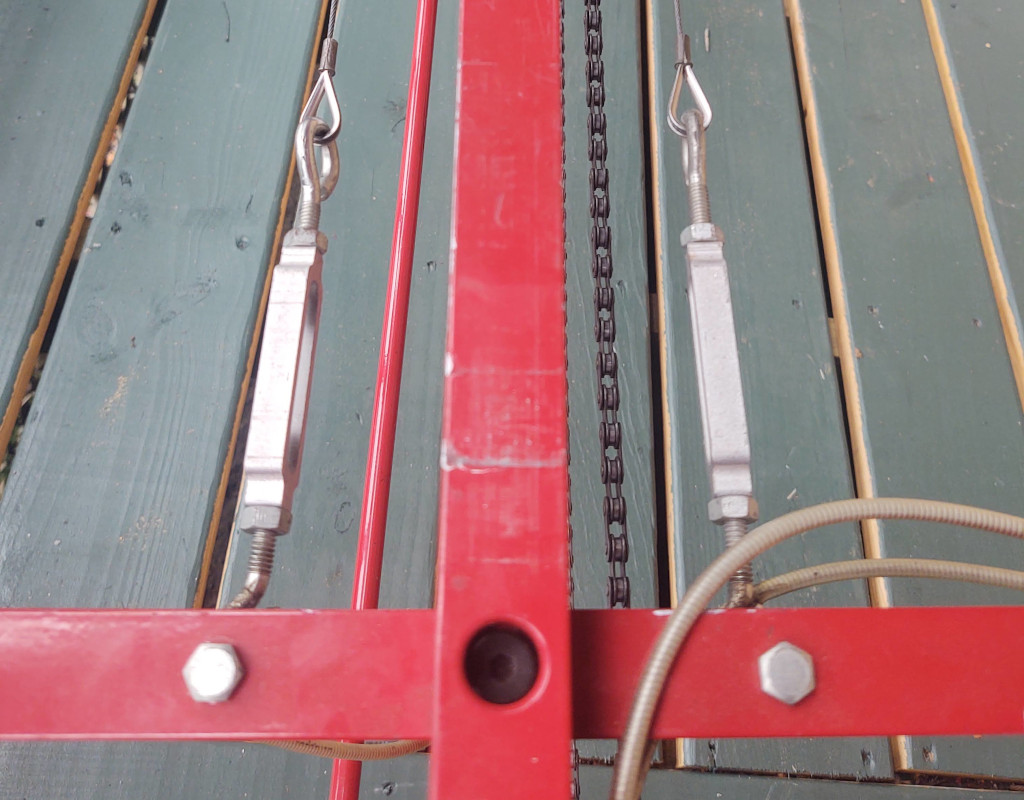
As I've written before, the Infinity recumbent is unusual in that it uses tensioned aviation cables to attach the handlebars to the front fork. Most indirect steering systems that I'm aware of, whether on recumbent bikes or front-loading cargo bikes, use some sort of a linking rod to control steering.
The cables run from the handlebars to what the bike manual calls the steering adapter, the black part behind the front brake in the photo to the left.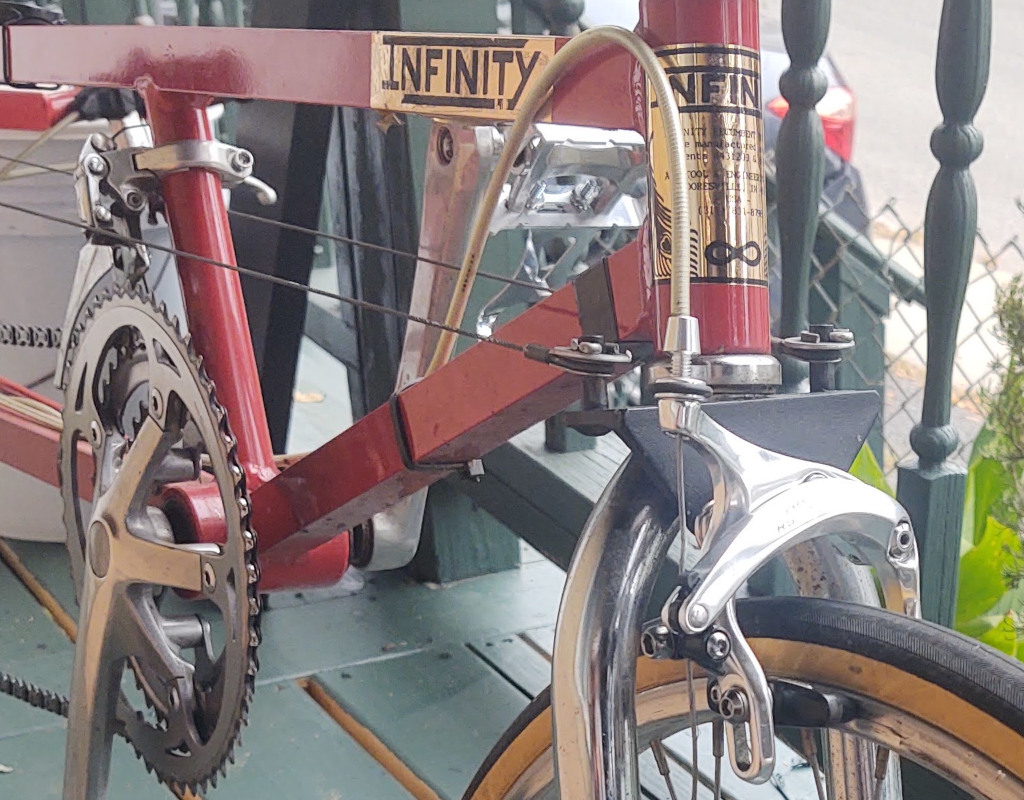
After owning this bike for several years, I've noticed several issues with the cable-based steering system, and I decided that I'd like to upgrade the bike to a more modern rod-based system.
The issues with cable steering
There a few different problems that the cables cause:
- Adjusting the alignment of the front wheel could be tedious, since proper tension on the cables needs to be maintained. If the cables need to be removed for any reason, they need to be readjusted when they are reattached to the bike.
- The constant tension of the cables on the front fork has, over many years, caused the headset to notch.
- The right-hand cable interferes with the front derailleur when the chain is in the largest chain ring. This has the potential to interfere with both shifting and steering.
- Though I suspect this is the result of people over-tightening them, I've seen reports that the cables can snap, which presents a safety issue. If one cable snaps, it becomes impossible to control the bike.
Replacing the cables with a linkage rod mitigates these issues. Alignment of the front wheel can be adjusted by rotating the linkage rod. There is no tension of the rod, so it does not pull on the fork. Only one cable is necessary for proper steering of the bike, so the right-hand cable can be eliminated. Finally, a solid aluminum rod is not nearly as likely to snap as a cable that's 30+ years old.
As can be seen here, the derailleur and the right-hand cable are very close together and can come into contact with each other while riding the bike. The original owner actually kept the cables too slack and ran the cable over the top of the derailleur; the wear from this is visible in this photo.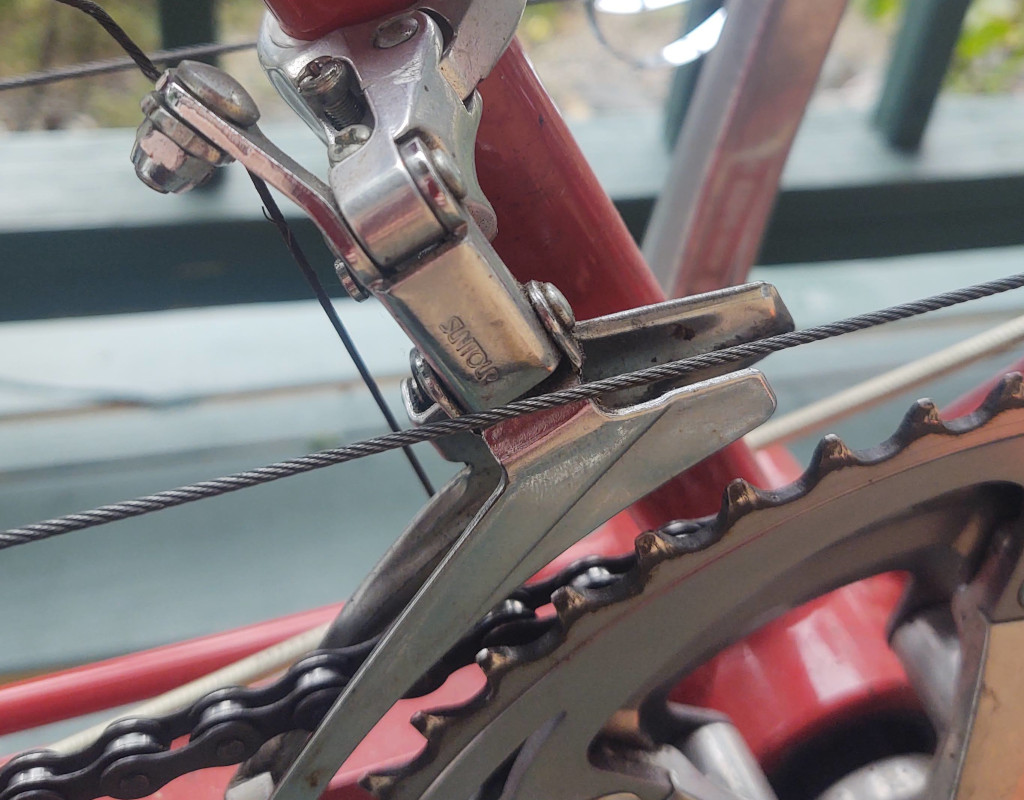
Assembling the parts
Gathering the correct parts to do this conversion was the most time-consuming part of this project. I had hoped, given the growth in popularity of cargo bikes in the past several years, that I'd be able to find an appropriate linkage rod through somebody specializing in cargo bikes and related parts. Unfortunately, I was never able to find anything that looked right.
I got lucky typing the appropriate strings into Google search, though, and discovered that what I was looking for is actually a part used in various parts of car transmissions and suspensions. The 36" transmission shifter rod kit from Speedway Motors fit the bill perfectly.
Linkage rods of this sort require rod-end joints (or Heim joints) in order to keep from jamming when the ends that the rod attaches to cannot be guaranteed to remain completely parallel. The Speedway kit comes with rod-end joints, but these had 3/8" holes in them. The handlebars on the Infinity are drilled for 1/4" bolts and the pegs on the steering adapter are 5/16". It is critical that diameter of the holes in the rod-end joints match the diameter of the parts they attach to, since we don't want there to be any play in the steering system.
To accommodate these different diameters, I replaced one of the rod-end joints with a different one I purchased from Midwest Control Products with a 5/8" bore, and I purchased a misalignment insert for the other rod-end that reduced the bore from 3/8" to 1/4". I had some difficulty finding these parts, since they had to be compatible with the 3/8" bore of the control rod itself.
Aside from these, the only other parts I needed was a longer bolt, some new washers, and a jam nut to attach the rod to the handlebars, and a new cotter to secure the other end of the rod to the pegs on the steering adapter.
Attaching the rod
Once I had everything, it was a fairly straightforward process to attach the rod to the bike.
A rod-end joint attached to the handlebars. The misalignment insert is inside rod-end joint.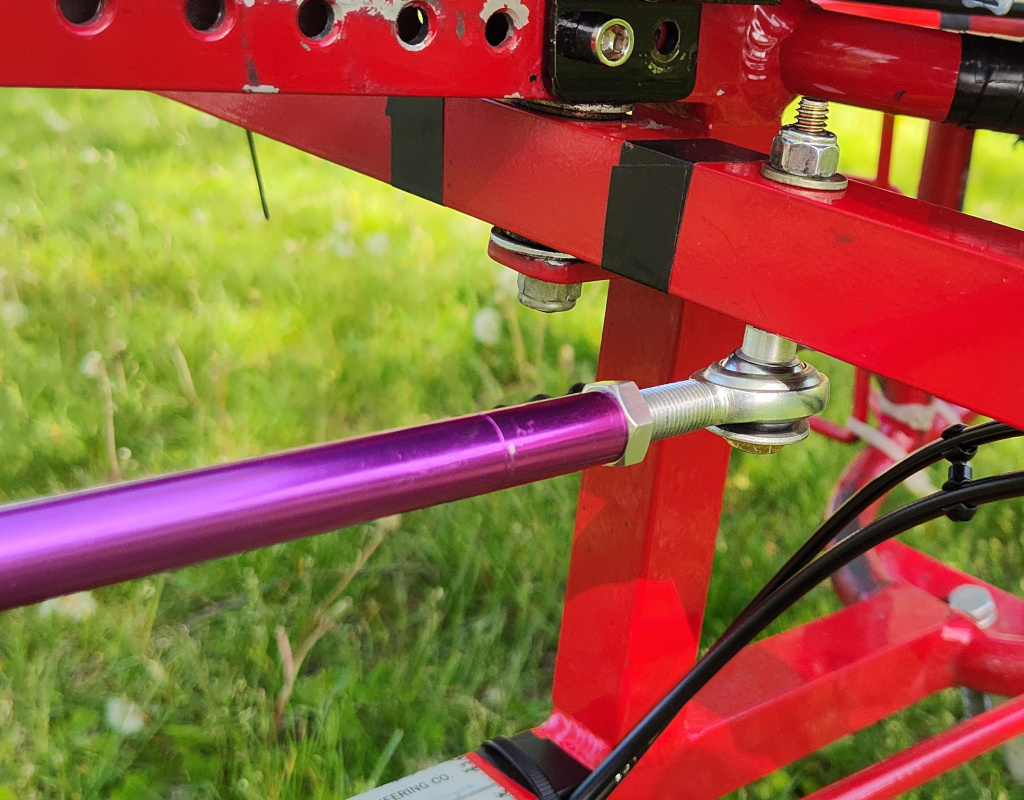
I started by removing the left-hand cable from the bike. I adjusted the bar-end joints in the rod so that they would extend far enough to attach to both the handlebars and steering adapter on the fork, and then I bolted the rod to the handlebars. The rod itself acts like a very long turnbuckle, so after I attached the rod to the steering adapter, I rotated the rod until it put a reasonable amount of tension on the right-hand cable. This way I knew that the steering was properly aligned the way it was before I took off the cable. Finally, I remove the right-hand cable.
A rod-end joint attached to the peg on the steering adapter. This is secured with a cotter. The washer is there to keep the joint from moving up and down, since this movement would introduce play into the steering.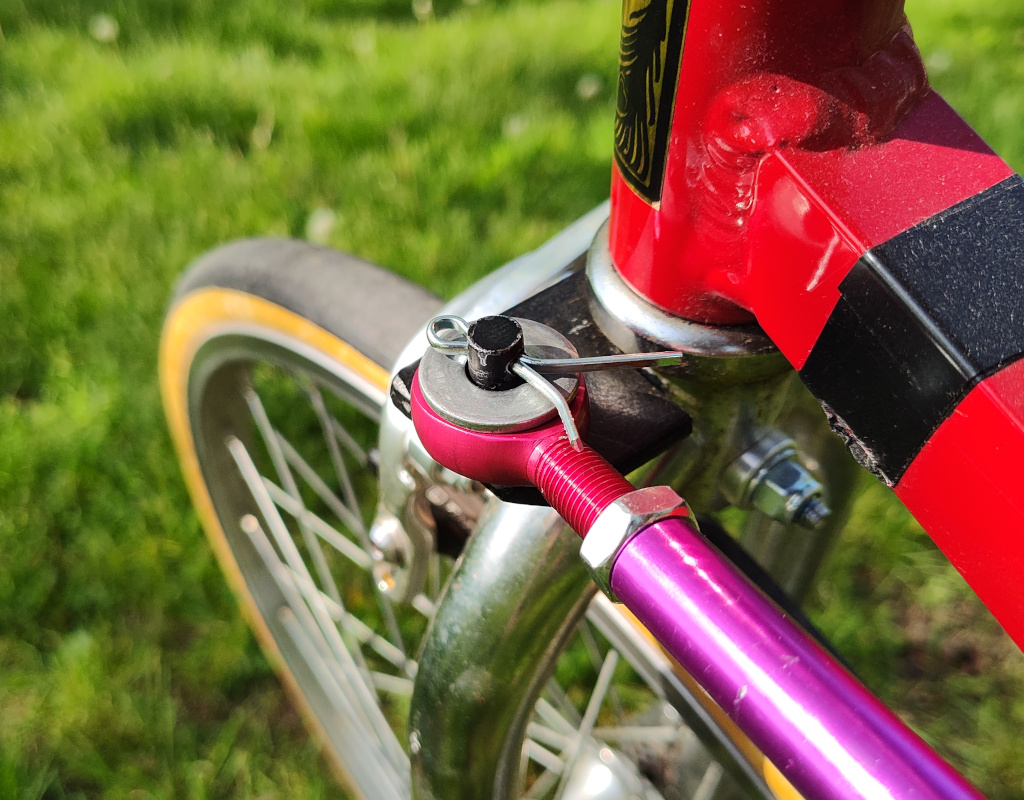
The steering is just as smooth as ever. It is very responsive, and there is little to no play in the rod or the joints. Maybe my only complaint is that my leg comes into contact with the rod a bit more often than it did with the cable (perhaps because of the rod's larger width). But this is only a minor gripe, and I expect to get used to it with time.